

Five Physical and Chemical Changes Experiments
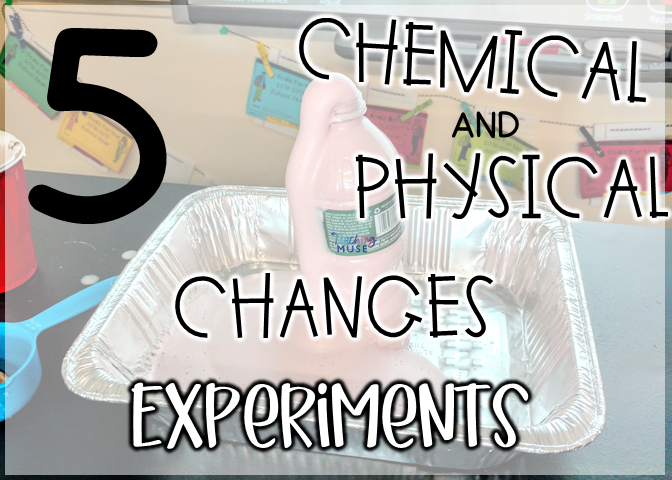
Science friend, are you looking for physical and chemical change activities to engage and motivate students? These five activities will have students differentiate the differences between a physical change and a chemical change while having a lot of fun. Depending on your classroom, you may choose to do these as demonstrations or allow students to work in small groups.
What is the difference between a physical change and a chemical change?
A physical change is a change in the size, shape, or state of matter.
A chemical change is a change that creates something new.
If you are new to teaching physical and chemical changes or would like a breakdown of how to teach this unit, click here .
Physical and Chemical Changes Experiments
Physical and chemical change experiment #1 : baking soda and vinegar.
This experiment is an easy win to incorporate into your physical and chemical changes unit if you are on a budget . Baking soda and vinegar are two staples in most kitchens. Bring these materials into your classroom.
Once you combine the two materials, students will be able to see bubbles form. Bubbles are one way to tell that a chemical change has occurred as it is a new substance that forms when baking soda and vinegar combine.
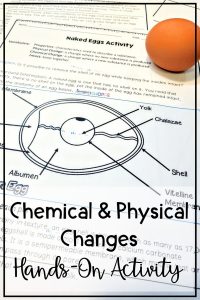
Chemical and Physical Change Experiment #2: Naked Eggs
This activity will take a few days to observe before seeing the results but is a great example of a chemical change. To complete this experiment, you will need:
- White vinegar
Discuss with the students about the egg. Then, ask them to predict what they think will happen when the vinegar meets the egg. Throughout the 3 days, students should see that the eggshell breaks down because of the acid in the vinegar. Eventually, the entire eggshell will disappear, leaving just the insides of the egg.
Why does this happen? This chemical change occurs because the egg actually has little holes in its shell. The vinegar, an acid, finds its way into these tiny holes and started to break it down. However, the egg’s insides will remain intact because there is a membrane surrounding it that holds everything together.
Chemical and Physical Changes Experiment #3: Gas Balloons
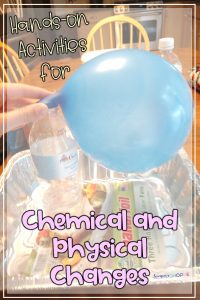
Another fun but easy experiment to use in your classroom involves soda and a balloon. Take a 1-liter bottle of any brand of soda and place a balloon around the mouth of the bottle.
This experiment will need about ten minutes to see the changes.
Over time, students should observe that the balloon begins to fill up and grow larger.
This experiment can be used to see if students are thinking critically about examples of chemical and physical changes. For example, while I teach students that bubbles can indicate a chemical change, the bubbles need to be a new substance. Since the bubbles are already in the soda bottle, this is not a chemical change. However, the size of the balloon is growing because the carbon dioxide from the soda is spreading out to fill the space in the balloon, which is a physical change.
Physical and Chemical Changes Experiment #4: Does surface area affect the rate of melting?
This activity is another one to observe a physical change. The materials are simple,
- a timer, and
Students will use the timer to calculate how long it takes ice cubes of different sizes and shapes to melt. Then, students can make comparisons for crushed or cubed ice. Next, have students use the ruler to determine the surface area of the cubes – but caution them from touching the cubes as their body heat will affect the melting rate.
Since this activity is monitoring a change of the state of matter, it is a physical change. However, students will enjoy working with the ice cubes, and the simplicity of this activity is perfect for integrating into your science classroom.
Chemical and Physical Changes Experiment #5: Digestion
Reinforce the concept that science happens in our bodies, including physical and chemical changes. For example, this experiment will mimic how the muscles of our bodies help to break down food in the human body to be digested.
For this experiment, you will need:
- 2 Ziploc bags
- Various food inside the bag
- 1/2 c Water
Fill the same types of food inside each bag trying to keep them as similar as possible. Pour about 1/2 c of water into each bag. Set your time for 5 minutes. Allow the bags to remain as they are.
After 5 minutes, mimic the stomach muscles moving to break down the food. Often, this is a classroom demonstration, so I will call students up to squeeze the bag to resemble stomach muscles.
Put the bags down, have students make observations, wait another five minutes and repeat. Students should observe that the food in the bag that has muscle contractions will break down more than the other bag.
While this demonstration shows a physical change, remind students that acids and enzymes help to further break down food which is a chemical change.
These are 5 super easy experiments to integrate into your physical and chemical changes unit. If you are looking for ready-made resources to use, check out the following:
- 8 Chemical and Physical Changes Experiments
- Physical and Chemical Changes Unit
- How to Teach a Unit on Chemical and Physical Changes
- Read more about: physical science , science , teacher tips , Uncategorized
You might also like...
5 Engaging Biome Activities for Grades 5-8

How to Motivate Your Students: Tips for Teachers
5 ways to teach current events in your social studies classroom, on instagram, @ateachingmuse.
Please go to the Instagram Feed settings page to create a feed.
Join the Science Squad

5 Ideas for Physical & Chemical Change: Experiments & Demonstrations They’ll Love

These ideas aren’t your average science experiments! We’re going to dig deeper with conservation of matter, CER, and a phenomenon-based science unit.
There are MANY physical and chemical changes you can observe, but here are 5 of my favorites for upper elementary. Many of these ideas include a focus on conservation of matter because the two concepts go hand in hand.
Physical changes are changes to the appearance or form of a substance, but the substance itself is not changed into a new substance. Chemical changes involve a substance changing into a new substance with different properties.
1. 🥛 Soda Surprise Investigation
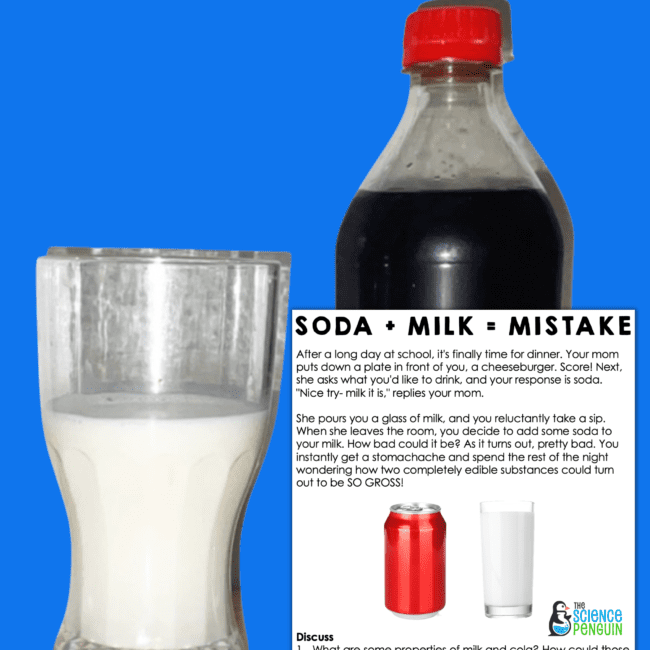
This scenario is provided at the beginning of the chemical change unit . Students discuss the scenario then investigate what occurs when soda and milk are mixed. Warning: It’s pretty gross but makes for a meaningful introduction!
Try it on your own or see the unit on TpT: Chemical Change Phenomena-based Science
2. 🎈 Baking Soda & Vinegar Balloon
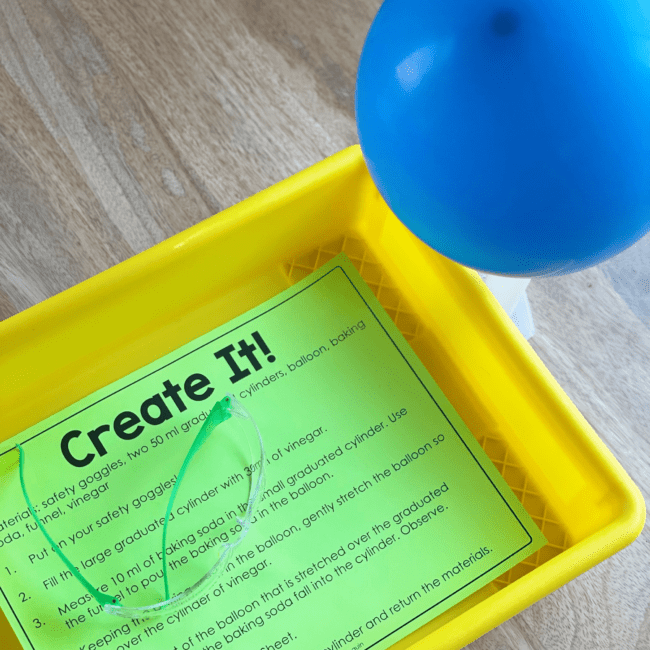
Take the traditional baking soda and vinegar reaction and add a balloon . When a balloon of baking soda is placed over a graduated cylinder of vinegar in a closed system , you can more easily observe the production of a gas. The reaction occurs and the balloon inflates!
There are many variations of this investigation from simple observation to experimental design to proving the conservation of matter.
This station is part of a stations set on TpT: Physical and Chemical Change Stations
3. 🌟 Glow Sticks
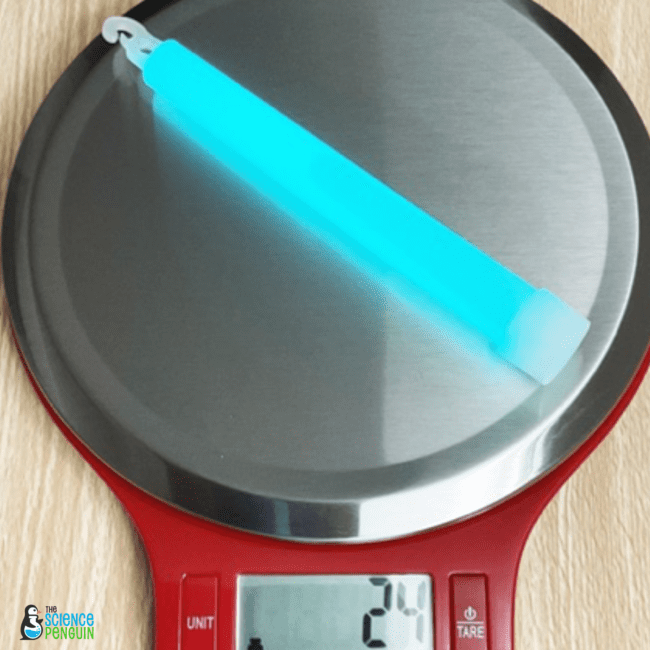
The glow stick is the perfect item to explore chemical change.
It’s cheap.
It’s not messy.
It’s a closed system.
Measure the mass of the glow stick before and after the chemical reaction to demonstrate the conservation of matter.
Try it on your own or see the unit on TpT: Conservation of Matter Phenomena-based Science
4. 🍬 Dissolving Sugar Cubes
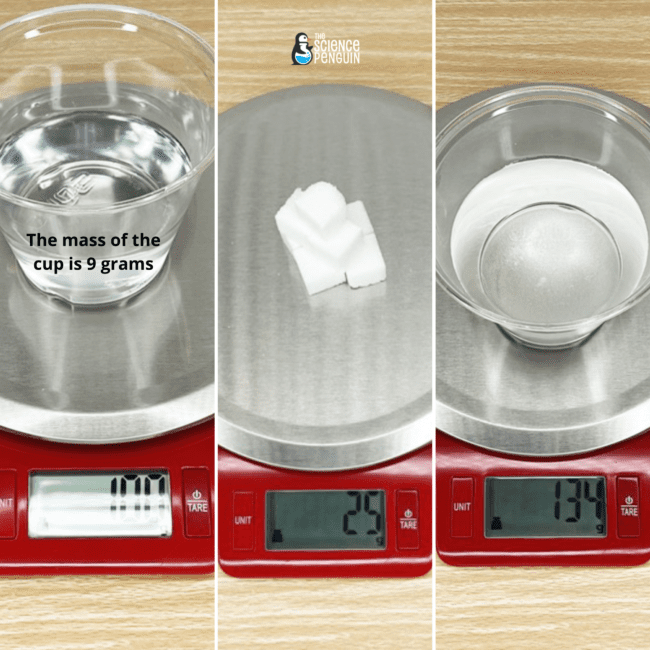
Dissolving is a simple observable physical change. I like sugar cubes for ease. In this lab, students demonstrate the conservation of matter while observing a physical change.
- balance or scale
- beaker with 100 ml water
- sugar cubes
- stirring rod/craft stick
- Measure the mass of the cup.
- Add 100 ml of water to the cup.
- Measure 25 g of sugar cubes.
- Add the sugar cubes to water and stir to dissolve.
- Measure the mass of the solution. Be sure to subtract the mass of the cup.
5. 🥤 Mentos + Diet Coke Demonstration
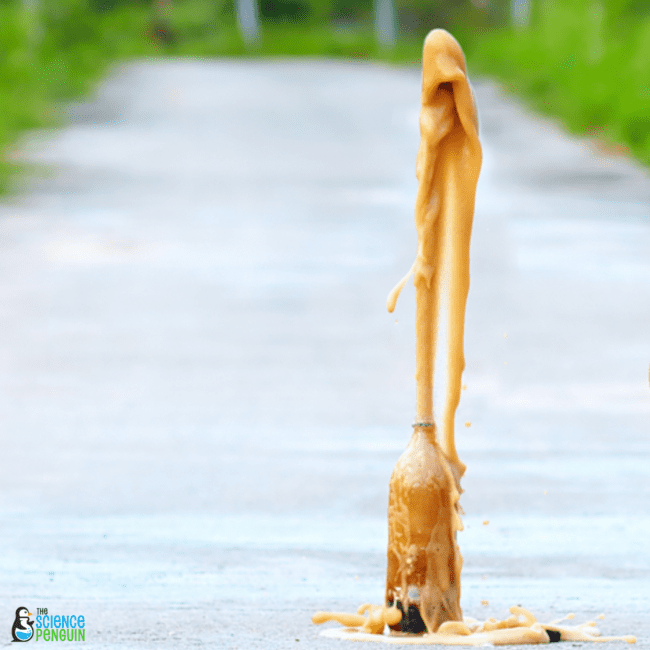
A fun way to wrap up your unit? Do the classic Mentos and Diet Coke demonstration!
Ask students to determine whether a physical change or chemical reaction occurred .
This one is tricky because it certainly seems like a chemical reaction similar to baking soda and vinegar, but it’s actually a physical reaction. Tiny bumps along the candy’s surface make the bonds between water and carbon dioxide easily broken, bubbling up, and resulting in that cool eruption.
Top Teaching Tools
Sign up for the free resource library.
This is an exclusive library of 40+ science printables, labs, activities, and games for grades 3-6. Sign up and check your email for immediate access.
- Read more about: 5th Grade , Physical Science
You might also like...
The Science Penguin Mini PD
CER (Claim Evidence Reasoning) in 3rd, 4th, and 5th Grade Science

5th Grade Science STAAR: 3 Tips to Master Short Constructed Response (SCR)

Hi, I'm Ari!
As a new teacher, I struggled to plan engaging, rigorous science lessons. Throughout my time teaching upper elementary and in my graduate studies, I discovered what worked well and developed science curriculum for busy teachers. Now, teachers across the country use Science Penguin activities every single day in their classrooms!
Want access to The Science Penguin Free Resource Library?
This is an exclusive library of 40+ science printables, labs, activities, and games for grades 3-6! Enter your personal email so your resources don't get stuck in a district filter!

- Science Notes Posts
- Contact Science Notes
- Todd Helmenstine Biography
- Anne Helmenstine Biography
- Free Printable Periodic Tables (PDF and PNG)
- Periodic Table Wallpapers
- Interactive Periodic Table
- Periodic Table Posters
- Science Experiments for Kids
- How to Grow Crystals
- Chemistry Projects
- Fire and Flames Projects
- Holiday Science
- Chemistry Problems With Answers
- Physics Problems
- Unit Conversion Example Problems
- Chemistry Worksheets
- Biology Worksheets
- Periodic Table Worksheets
- Physical Science Worksheets
- Science Lab Worksheets
- My Amazon Books
Examples of Chemical Change and How to Recognize It

A chemical change is a change in the form of matter resulting from a chemical reaction . Either one substance breaks down into other substances or else two or more materials combine and form new products. In contrast, a physical change occurs when a substance changes its form, but not its chemical identity. Here are examples of chemical changes and a look at how to distinguish them from physical changes.
- In a chemical change, the starting and ending materials have a different chemical composition.
- Examples of chemical changes include cooking, combustion, digestion, and rotting. All involve chemical reactions.
- While many physical changes are reversible, the only way to reverse a chemical change is via a chemical reaction. Even then, some chemical changes are not reversible.
Examples of Chemical Change in Everyday Life
Chemical changes occur whenever a chemical reaction occurs. This includes reactions in the lab, but chemical changes are common in the world around us, too. Here are examples of chemical changes in everyday life .
- Burning any fuel, such as wood or propane
- Digesting food
- Baking a cake or cookies
- Electroplating a metal
- Using a battery
- Rotting food
- Exploding fireworks
- Rusting metal
- Ripening food
- Souring milk
- Photosynthesis
- Mixing vinegar and baking soda (an acid and a base)
- Browning meat
- Bleaching a stain
- Dyeing hair
- Leaves changing colors
How to Recognize a Chemical Change
A chemical change involves a chemical reaction, so matter has a different composition before and after the change. Since you can’t see matter at a molecular level, recognizing a chemical change means looking for evidence of a reaction. Here are some indications of a chemical change:
- Changing color
- Producing gas
- Changing temperature
- Producing odor
- Changing chemical properties (e.g., oxidation state, flammability)
- Forming a precipitate
- Producing sound
- Producing light
- Difficult or impossible to reverse
Note that some of these signs also accompany physical changes. For example, phase changes affect temperature. Crushing a can produces a sound. But, a chemical change typically involves several signs, while a physical change only produces one or two.
Is a Chemical Change Reversible?
Irreversibility is often cited as the key indicator of a chemical change. However, some chemical changes are reversible via another chemical reaction. For example, combining hydrogen and oxygen and forming water is a chemical change that you can reverse by a chemical reaction. Most chemical changes are irreversible. If you burn wood, no chemical change returns ashes back into their earlier form. If you cook an egg, you can’t un-cook it. But, some physical changes are irreversible, too. Shredding paper is a physical change, but you can’t really put the pieces back together again.
Types of Chemical Changes
Chemical changes are classified as inorganic chemical changes, organic chemical changes, and biochemical chemical changes.
Inorganic Chemical Changes
Inorganic chemical changes involve inorganic compounds. Mostly, these are chemical reaction that don’t involve carbon. Sometimes these reactions occur in a lab, but other times they appear in the world around us. Here are some examples of inorganic chemical changes.
- Tarnishing silver
- Chemical weathering of rocks
- Acid-base reactions
- Redox reactions
- Electrochemical cell reactions
- Haber process of making ammonia (NH 3 )
Organic Chemical Changes
Organic chemical changes are chemical reactions involving organic compounds . These are substances that contain both carbon and hydrogen. Here are some examples of organic chemical changes.
- Making gasoline from petroleum
- Making nylon and most other polymers
- Synthesizing aspirin
- Cleaning with soaps and detergents
Biochemical Chemical Changes
Technically, biochemical chemical changes are a class of organic chemical changes. The difference is that biochemical changes occur in living organisms. Here are examples of biochemical chemical changes:
- Cellular respiration
- Burgin, Mark (2016). Theory Of Knowledge: Structures And Processes . World Scientific. ISBN 9789814522694.
- Meyers, Robert A. (2001). Encyclopedia of Physical Science and Technology (3rd ed.). Academic Press. ISBN 978-0-12-227410-7.
- Vogel, A.I.; Tatchell, A.R.; Furnis, B.S.; Hannaford, A.J.; Smith, P.W.G. (1996). Vogel’s Textbook of Practical Organic Chemistry (5th ed.). Prentice Hall. ISBN 0-582-46236-3.
- Zumdahl, Steven S.; Zumdahl, Susan A. (2000). Chemistry (5th ed.). Houghton Mifflin. ISBN 0-395-98583-8.
Related Posts

5 Experiments to Teach Chemical Changes to Elementary Students
Why you should teach chemical changes.
A chemical change occurs when a chemical substance is transformed into one or more other substances. I find that teaching chemical changes is a great way to teach the properties of matter because it provides students an opportunity to visually see a change, rather than just interacting with numbers and formulas. Often the best way to teach science is by bringing complex ideas to life and making it fun!
The following five experiments are my favorite ways to teach chemical changes to elementary students:
1. Observing the Formation of Gas
This is a very easy experiment to teach a chemical change to young kids. For this experiment, collect an old soda bottle, vinegar, baking soda, a balloon, and a funnel. Have the students put two spoonfuls of baking soda into the balloon and then using the funnel, pour vinegar into the old soda bottle until it is about half full. Stretch the balloon around the top of the bottle carefully to not let the baking soda fall into the bottle. When ready, make the balloon stand up by pouring the baking soda into the bottle.

When baking soda reacts with vinegar, a gas (carbon dioxide) is created. This gas is trapped inside the bottle and balloon, causing the balloon to inflate. Students can observe how this chemical change completely changes the balloon!
2. Observe Color Changes
First, fill three glass jars halfway with water. Separately, collect food coloring of 3 different colors, a cup of bleach, vinegar, and hydrogen peroxide (do not mix). Start the experiment by having students put colorings into the water to show a physical change (color change). Next, the teacher puts a spoonful of vinegar in one glass, a spoonful of bleach in another glass, and a spoonful of hydrogen peroxide in the last glass (and don’t forget safety glasses while you do!). Have the students determine in which glass(es) a physical change occurred and in which a chemical change occurred. This will open a discussion on how they knew which mixtures prompted physical or chemical changes, with the students providing real examples from their own observations.

3. Make Orange Fizz
Another super fun (and tasty) way to teach chemical changes is to make orange fizz. All you need are oranges and baking soda. Cut the orange and dip a slice into baking soda and try it!
4. Make Instant Snow
How much fun would it be to make snow in the summer to teach science? For this fun experiment, all you need is shaving cream and baking soda. Mix about 2 cups of each in a bowl and keep adding more to get the consistency that you like. Have fun and see the chemical change right in front of your eyes! Download the free activity sheet for full instructions.

5. Mentos and Coke
This is the most popular of all chemical change experiments of all! For this experiment, all you need is diet coke and mentos. Open the bottle of diet coke, quickly drop the mentos in, and back away quick. Kids will love watching the geyser that explodes! This always gets a great reaction out of the students and really brings chemical changes to life!
Looking for more chemistry ideas? Check out these engaging chemistry experiments!

About the Author: Jessica Fitzpatrick

Related Posts
Robotics Activities for Hour of Code
Motion vs Speed: Worksheets for High School STEM
Using Makedo to Inspire Resourcefulness and Creativity
Transforming Core Lessons with Dash
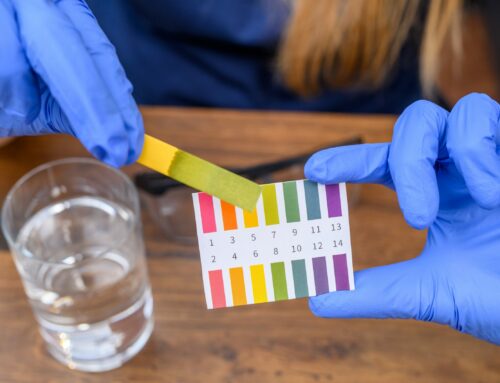
Cabbage Chemistry: Exploring Acids and Bases
Leave a comment cancel reply.
Save my name, email, and website in this browser for the next time I comment.
Sign up to receive the latest STEM resources, activities, and more from educational professionals like you straight to your inbox!
Get Your ALL ACCESS Shop Pass here →


Examples Of Chemical Change
What is a chemical change? Learn how to identify a chemical change vs. a physical change with a simple definition and everyday examples and free printable chemistry activities.
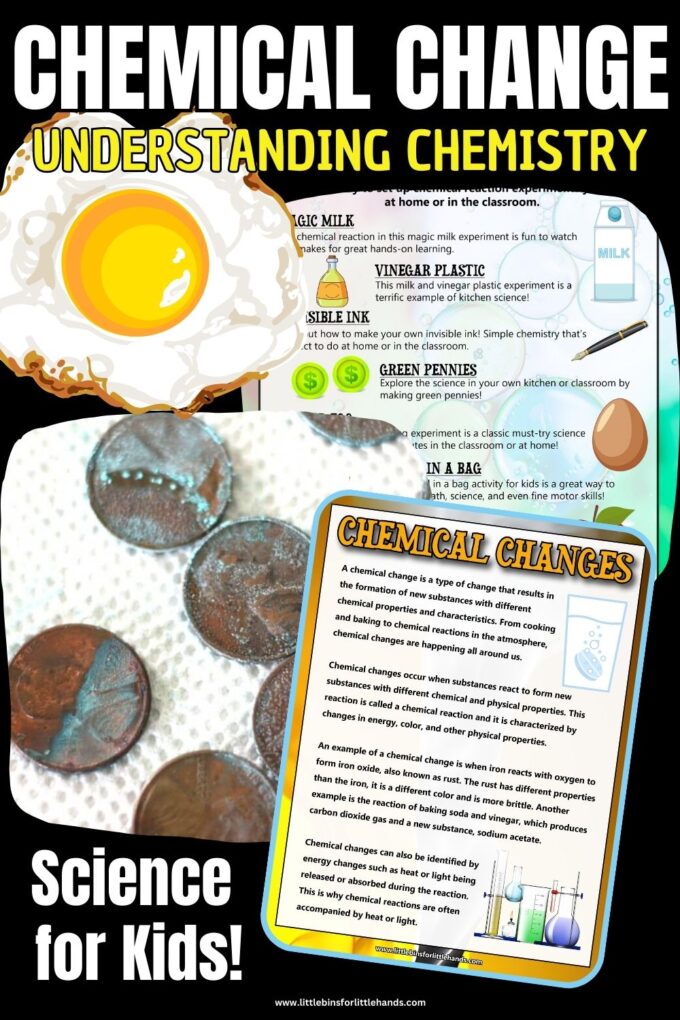
What Is A Chemical Change?
Chemical changes occur when substances react to form new substances with different chemical and physical properties to the original substances. This reaction is called a chemical reaction and changes in energy, color, and other physical properties characterize it.
One example of a chemical change is when iron reacts with oxygen to form iron oxide, also known as rust. Rust has different properties than iron: it is a different color and more brittle.
Another example of a chemical change is the reaction of baking soda and vinegar, which produces carbon dioxide gas and a new substance, sodium acetate.
Chemical changes can also be identified by energy changes, such as heat or light being released or absorbed during the reaction. This is why chemical reactions are often accompanied by heat or light.
Chemical vs Physical Change
What is the difference between a physical change and a chemical change? A change in shape or form can identify a physical change, however, it doesn’t undergo a chemical process to become a new substance.
💡 Learn more about physical changes here.
Often physical changes are reversible; think of ice melting to form a liquid and then frozen again to form solid ice, as in our Solid, Liquid, Gas experiment. Chemical changes are irreversible, therefore, they cannot be easily undone.
Typically you can tell that a chemical change has occurred by looking for one or more of these indicators…
- Color change
- Change in appearance
- Odor produced
- Gas produced
- Heat produced
- Heat absorbed
- Light emitted
Is boiling water a chemical change?
When you boil water, the liquid water molecules change to gaseous water molecules, and evaporate into the air. Can this change be easily reversed? Has a new substance formed? Well no! Gaseous water is the same as liquid water, it is simply a different state of matter . If you were to place a lid on top of the boiling water, you would see the gas condense back into liquid.
Is frying an egg a chemical change?
Cooking an egg for breakfast, that runny egg white and yolk change to a solid egg. You will notice the clear egg white also changes to a white color. The heat from frying the egg has caused a chemical change to occur. It changes the structure of the egg’s protein in a process called denaturing. The change is permanent!
Everyday Examples Of Chemical Changes
Here are 15 everyday examples of chemical changes. Can you think of any more?
- Burning wood
- Baking a cake
- Frying a steak
- Boiling an egg
- Burning a candle
- Lighting a match
- Rusting nails
- Washing hands with soap
- Fermentation
- Souring milk
- Photosynthesis
- Digesting food
- Banana rotting
- Chemical batteries
- Running a lawn mower
FREE Chemical Change Guide to get started!
Share examples of chemical changes and the fun science behind them with this free printable chemical changes guide.
💡 Our chemistry experiments will teach you about chemical reactions, acids and bases, solutions, crystals, and more! All with easy household supplies!
Chemical Change Experiments
Here are some fun examples of chemical changes in experiments that use everyday household items. What could be easier? Think baking soda, vinegar, hydrogen peroxide, lemon juice, Alka Seltzer tablets, and more!
Alka Seltzer Rocket
Use the chemical reaction that happens when you add an Alka Seltzer tablet to water to make this cool DIY Alka Seltzer rocket.
Apple Browning Experiment
Why do apples turn brown? It is all to do with a chemical change when the cut part of the apple reacts with air.
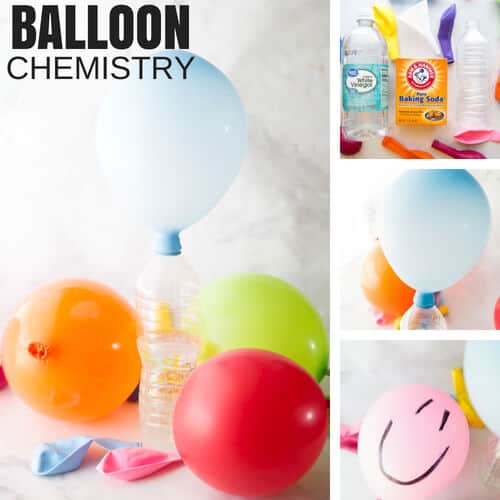
Balloon Experiment
Use a classic baking soda and vinegar reaction to inflate a balloon.
Make homemade bath bombs for a fun chemical change in your bath. Try our Christmas bath bomb recipe , LEGO bath bombs or make Halloween bath bombs . The base ingredients are the same, citric acid and baking soda.
Baking Powder Science
Find out what happens to baking powder when you add water. Here is a simple chemical reaction that you use in baking.
Bottle Rocket
Turn a simple water bottle into a DIY water bottle rocket using a baking soda and vinegar chemical reaction.
Bread In A Bag
A fun chemical reaction you can eat! The chemical change is in the dough, notice what it looks like raw and then cooked. Follow our bread in a bag recipe for a fun treat the kids are sure to enjoy!

Citric Acid Experiment
Grab some oranges, lemons, and baking soda to experiment with citric chemical reactions! Or just check out this lemon volcano .
Cranberry Experiment
What happens when you add baking soda to cranberry and lemon juice? Lots of fizzing action, of course!
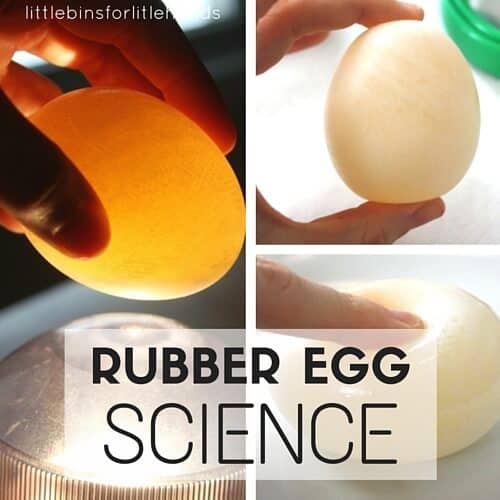
Egg In Vinegar
Can you make a naked egg? Observe how a chemical reaction between calcium carbonate (eggshell) and vinegar makes for a bouncy egg.
Elephant Toothpaste
Kids of all ages will love this exothermic chemical reaction using hydrogen peroxide and yeast. Not only does it produce a lot of froth when the ingredients combine together. Hence the name! The reaction also produces heat.
Green Pennies
Explore how the patina of pennies forms from a chemical reaction. Try this fun penny experiment!

Invisible Ink
Write a message that no one else can see until the ink is revealed. Find out how to make your own invisible ink that is revealed with a simple chemical reaction.
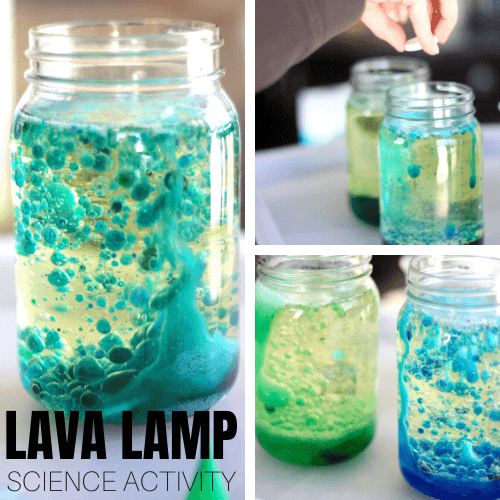
Lava Lamp Experiment
This oil and water experiment does involve a bit of physics but it also includes a fun Alka Seltzer reaction!
Milk And Vinegar
Kids will be amazed by the transformation of a couple of common household ingredients, milk and vinegar, into a moldable, durable piece of a plastic-like substance.
Popping Bags
You will want to take this fun experiment outside! Try bursting bags with only a baking soda and vinegar reaction.
Potato Battery
Light a bulb using a potato and some zinc and copper nails, and learn about chemical reactions and circuits.
Making slime has to be one of the most fun examples of a chemical change. Watch how 2 ingredients, glue and saline solution (slime activator) becomes an amazing goopy, stretchy, slimy substance.
Yeast Fermentation
Investigate how quickly yeast converts sugars into alcohol and carbon dioxide (CO₂) in the absence of oxygen when you add different types of sugar to yeast (fermentation).
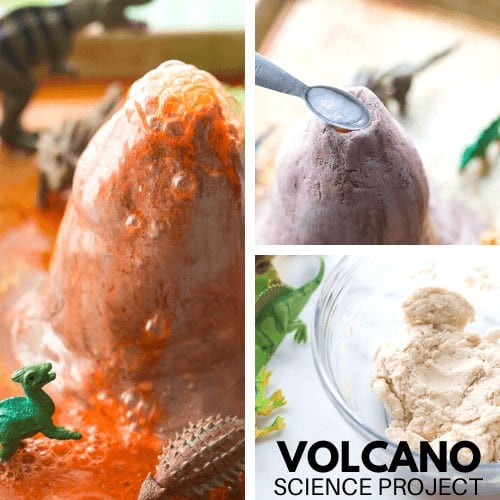
Make a homemade volcano project with salt dough and baking soda and vinegar reaction . Of course, there is so many more ways to have fun with baking soda and vinegar volcano.
- Sand Box Volcano
- Pumpkin Volcano
- Lego Volcano
- Apple Volcano
- Slime Volcano
- Snow Volcano
More Helpful Science Resources
Here are a few resources to help you introduce science more effectively to your kiddos or students and feel confident when presenting materials. You’ll find helpful free printables throughout.
- Best Science Practices (as it relates to the scientific method)
- Science Vocab
- 8 Science Books for Kids
- What Is A Scientist
- Science Supplies List
- Science Tools for Kids
Science Experiments By Age Group
We’ve put together a few separate resources for different age groups, but remember that many experiments will cross over and can be re-tried at several different age levels. Younger kiddos can enjoy the simplicity and hands-on fun. At the same time, you can talk back and forth about what is happening.
As kiddos get older, they can bring more complexity to the experiments, including using the scientific method , developing hypotheses, exploring variables , creating different tests, and writing conclusions from analyzing data.
- Science for Toddlers
- Science for Preschoolers
- Science for Kindergarten
- Science for Early Elementary Grades
- Science for 3rd Grade
- Science for Middle School
Printable Science Projects For Kids
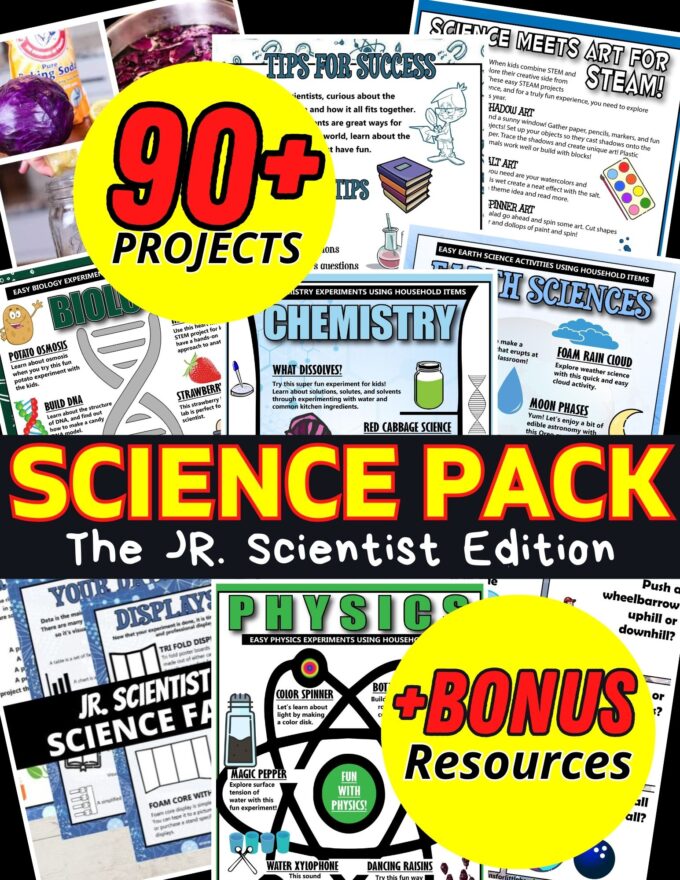
If you’re looking to grab all of our printable science projects in one convenient place plus exclusive worksheets and bonuses like a STEAM Project pack, our Science Project Pack is what you need! Over 300+ Pages!
- 90+ classic science activities with journal pages, supply lists, set up and process, and science information. NEW! Activity-specific observation pages!
- Best science practices posters and our original science method process folders for extra alternatives!
- Be a Collector activities pack introduces kids to the world of making collections through the eyes of a scientist. What will they collect first?
- Know the Words Science vocabulary pack includes flashcards, crosswords, and word searches that illuminate keywords in the experiments!
- My science journal writing prompts explore what it means to be a scientist!!
- Bonus STEAM Project Pack: Art meets science with doable projects!
- Bonus Quick Grab Packs for Biology, Earth Science, Chemistry, and Physics
Subscribe to receive a free 5-Day STEM Challenge Guide
~ projects to try now ~.

- Terms & conditions
- Privacy policy
© 2023 Sorting Hat Technologies Pvt Ltd
Simple Experiments to Show Chemical Changes
Chemistry is an interesting subject and the chemical and physical changes involved make it even more interesting. Read on to know about a few experiments that exhibit chemical changes.
The changes we see around us can be classified into physical and chemical changes. With their individual features and properties, they have different affect on our daily life. Further, their differing properties also has a major role to play in our understanding and knowledge in the field of Chemistry. Let us try to understand more about physical changes, how to identify them and their basic features.
What are Chemical Changes?
A chemical change is one where there are changes in the chemical properties of the components. Their chemical composition may change and the final product may have different properties as compared to the original components.
Let us take the example of an apple. When you cut it and keep it in the open for some time, you will notice that it has a brownish hue on its surface. This happens because the acid in apple reacts with the atmospheric humidity and other trace elements present and gives the apple surface a brownish-yellow color.
Common Examples of Chemical Change
There are quite a few experiments that can be carried out at home or in school laboratories to show chemical changes. Here are some that you can try.
Color Change of Apple
Take a knife and cut an apple in half. Leave it unattended for 10-15 minutes. You will find that the surface of the apple now has a brown-yellow color. This is due to the action of the acid in the apple with the air and moisture around.
Bleaching is a great experiment choice to show that chemical changes can also cause change in colors. Take 200 ml of water in a beaker and add 2 drops of food coloring to it. Mix it thoroughly with a stirring rod until the color is uniformly distributed.
Add about 30 ml bleach into the mixture and in a matter of seconds, you will notice that the color disappears. Though it may seem colorless now, you must remember that this is no longer water, but rather a mixture of water, food color and bleach, which has a different chemical composition from water altogether.
Bottle Balloons
Making balloons from bottles is a great experiment to showcase chemical changes. In a bottle, take water and baking soda. Mix it until the baking soda is completely dissolved. Pour some lemon juice into the bottle and cover the mouth of the bottle with a balloon.
After some time, you will notice that the balloon gets filled with a gas.This is an acid-base neutralization reaction. The base which is baking soda acts with acid in lime juice to produce a gas.
Coke and Mentos
You may already know of this experiment from videos on YouTube. For this experiment, take a small bottle of Coca Cola and put a few Methods pills in it. An explosive reaction will take place in a few seconds as the Coke rushes out of its bottle.
This is a very common experiment, but due to the sudden outburst of energy, one must take certain precautionary steps. Since this is a small-scale experiment, a small bottle of coke and a few Mentos must be used. Using too much can make the experiment spiral out of control, especially if it is carried out at home.
As you see changes around you, you should now be able to understand whether they are chemical or physical changes. Being able to understand them helps a lot in basic Chemistry that forms the backbone of more advanced concepts. Simply looking at changes around you and classifying them as physical or chemical in nature can help you figure out how nature works.
Frequently asked questions
Get answers to the most common queries related to the NDA Examination Preparation.
What are chemical changes?
What are the main features of a chemical change, is iron rusting a chemical change, state a few factors that affect a chemical change..
Ans. Chemical changes are those where changes in the chemical nature and composition of the components take place. Rotting of fruits and vegetables can be a good example of a chemical change. Here, there are significant chemical changes in the rotten part of the fruit or vegetable.
Ans. A chemical change is usually occurs with one or more of the following changes:
- Formation of gases
- Colour change
- Change in temperature
- Formation of a precipitate
- Change in volume
- Change in smell or taste
- Energy release
Ans. Yes, rusting of iron is a chemical change. In this process, iron acts with oxygen and moisture in the air to give rust, which is a form of ferrous oxide. This is an irreversible chemical change.
Ans. There are five main factors which affect the rate of a chemical change:
- Reactant concentration: The higher the concentration of reactants, the more spontaneous the reaction will be.
- Physical state of reactants: The physical state of the reactants also determine the rate of chemical change. If the reactants are in a more fluid state, then they can easily interact with each other and hence the speed of the chemical change increases. On the other hand, solids tend to react on the surface only.
- Temperature: Different chemical changes have different temperature requirements. In most cases, a higher temperature provides greater energy to the reactants, and hence helps in carrying out the change efficiently.
- Surface area: The greater the surface area of the reactants are in contact, the greater the rate of the change will be.
- Catalyst: Many changes cannot proceed without a catalyst. A catalyst is a chemical element or compound that helps in progressing or regressing the rate of the reaction without having any effect on the reaction itself. Sometimes changes are too slow and need a catalyst to fasten it up, while in some cases, the reaction may be too fast to understand the changes. In such cases, a regressing catalyst is required. Many reactions may even occur without the presence of a catalyst.

Evidence of Chemical Change Labs – Experiments for Kids
These chemical change labs explore five types of evidence: bubbles, color, heat, odor, and light. First, kids experiment with physical change. Then they launch into reactions that create new substances.

Mr. Grow Plans His Physical and Chemical Change Unit
Our favorite fifth grade teacher sat at the side table with his teaching partner. “Today,” he said, “we’ll continue planning our matter activities . This week, our kids are getting an introduction to matter . Next up, physical and chemical change.” He pulled up the standard on his computer and read it aloud:
NGSS 5-PS1-4 Conduct an investigation to determine whether the mixing of two or more substances results in new substances.
“Actually,” said Mrs. Washington, “I’ve been giving this one some thought. Obviously, kids must discriminate between physical and chemical changes. But how? So I did a little research. As it turns out, reactions provide evidence. Through my investigation, I found five types: bubbles, color, heat, odor, and light.”
“Hmm,” Mr. Grow said, “Can kids do an experiment for each one?”
Mrs. Washington’s eyes twinkled. “I already found some physical and chemical change activities .” She beckoned to Mr. Grow, and he moved around to look at her laptop screen.
“Six labs illustrate specific changes. They seem wonderful to me. However, I’d like to try them out. Let’s split them up. Tomorrow we’ll meet again. Then we can try each lab ourselves.”
Physical Change
As promised, the two teachers met the following day. In their arms, each carried a bag of materials. After walking to the side table, they organized everything. Finally, they were ready to share.
“First,” said Mrs. Washington, “let’s try the lab on physical changes.
“For states of matter, they’ll just observe an ice cube. To explore mixtures, they’ll stir together two groups of small items. For example, lima beans and marbles. Then for a solution, they can stir together sugar and water. For all of these activities, kids will work in their science lab groups .”
“How will they respond?”
“For every activity in this sequence, kids fill out a lab sheet. In each, they discriminate between physical and chemical change. You know, was a new substance created? To prove it, they explain the evidence. And we’ll be giving them plenty of it!”

Chemical Change with Bubbles as Evidence
After Mrs. Washington finished, Mr. Grow pointed to his first set-up. “In this lab, kids experiment with vinegar and baking soda.”
Then he demonstrated. With an eyedropper, he added just a few drops of vinegar to the white powder. Soon, bubbles fizzed in the cup. “Here, kids see the first type of evidence of chemical change. If they look carefully, they can also see that the baking soda has changed. A new substance has been created.”
Mrs Washington nodded.

With Color Evidence
Mr. Grow continued. “I wasn’t sure the next experiment would work.”
As he spoke, he added red food coloring to three cups of water. Then he added different liquids to each one.
“First, I’ll add about 20 drops of vinegar to this cup.” Although Mrs. Washington watched carefully, nothing happened.
“Second, I’ll add 20 drops of hydrogen peroxide to this one.” Again, nothing happened.
“Third, I’ll put 20 drops of bleach in the last cup.” At first, nothing happened.
Then – “Oh wow!” Mrs. Washington exclaimed. “The color is fading! For some reason, I expected one of the cups to turn blue or something.”
Mr. Grow laughed. “No, in this lab, evidence of chemical change is color. But here, kids observe loss of it.”
“This is a good one,” Mrs. Washington said. “However, I don’t trust kids to work with bleach. Therefore, we’ll do this as a demonstration.”

With Heat Evidence
“Wait until you see this experiment,” Mr. Grow said. Quickly, he moved to his third lab set-up.
“First, I fill this cup about one-fourth of the way with hydrogen peroxide. Second, I record the temperature.”
He put a thermometer into the liquid and waited a few seconds. “About 71 degrees Fahrenheit.”
“Next, I add a teaspoon of yeast.” Immediately, it began to bubble.
The two teachers stared at the thermometer. “75.3, 78.2, 80!” Over the next few minutes they watched as the temperature topped out at 101.4 degrees.
Mrs Washington placed her hand on the outside of the cup. “Yep, it’s warm. And wow! That was some dramatic demonstration! The kids will love it!”
“This time,” said Mr. Grow, “evidence of chemical change included both bubbles and heat.”

With Odor Evidence
“Now it’s my turn again,” said Mrs. Washington.
She held a cup near Mr. Grow’s nose. “Give it a sniff,” she said.
“Hey, what’s in there?”
“Just some iron filings. Do you smell anything?”
Mr. Grow shook his head. “No.”
Next, Mrs. Washington held up a small container. “Smell again. This is hydrogen peroxide.”
Again, Mr. Grow shook his head. “No strong odor.”
Finally, Mrs. Washington placed a few drops of the liquid in the cup. Quickly, she held the cup near Mr. Grow’s nose.
“Ewww! Rotten eggs!”
Mrs. Washington grinned. Just what she was looking for. A dramatic way to illustrate that odor is evidence of chemical change.

With Light Evidence
Next, Mrs. Washington took out a container of glow sticks.
“The kids will love those!” said Mr. Grow.
Mrs. Washington nodded and smiled. Then she picked up a glow stick and bent it. Snap! Immediately, it began to glow.
“We can explain that the stick is filled with a liquid. Then, bending breaks tiny capsules full of another liquid. As soon as the two meet, they form a new substance, and light energy is emitted.”
“Perfect!”

Enjoy Teaching Physical and Chemical Change Labs
Both teachers grinned.
“You know, these chemical change labs will be a hit,” said Mr. Grow. “Next, we’ll work on the law of conservation of mass and properties of matter .”


IMAGES
COMMENTS
This experiment can be used to see if students are thinking critically about examples of chemical and physical changes. For example, while I teach students that bubbles can indicate a chemical change, the bubbles need to be a new substance. Since the bubbles are already in the soda bottle, this is not a chemical change.
Aug 5, 2022 · Ask students to determine whether a physical change or chemical reaction occurred. This one is tricky because it certainly seems like a chemical reaction similar to baking soda and vinegar, but it’s actually a physical reaction. Tiny bumps along the candy’s surface make the bonds between water and carbon dioxide easily broken, bubbling up ...
Jun 9, 2021 · Is a Chemical Change Reversible? Irreversibility is often cited as the key indicator of a chemical change. However, some chemical changes are reversible via another chemical reaction. For example, combining hydrogen and oxygen and forming water is a chemical change that you can reverse by a chemical reaction. Most chemical changes are irreversible.
The following five experiments are my favorite ways to teach chemical changes to elementary students: 1. Observing the Formation of Gas. This is a very easy experiment to teach a chemical change to young kids. For this experiment, collect an old soda bottle, vinegar, baking soda, a balloon, and a funnel.
Dec 31, 2013 · Simple examples of evidence of chemical change include: a temperature change away from room temperature, changes in phase (a gas, a liquid, or a solid), change in color, solubility or precipitation (forming a new solid), how clear a solution is, and anything new and different or unexpected. Objectives In this experiment you will
Nov 10, 2024 · A change in shape or form can identify a physical change, however, it doesn’t undergo a chemical process to become a new substance. Learn more about physical changes here. Often physical changes are reversible; think of ice melting to form a liquid and then frozen again to form solid ice, as in our Solid, Liquid, Gas experiment.
Color Change of Apple. Take a knife and cut an apple in half. Leave it unattended for 10-15 minutes. You will find that the surface of the apple now has a brown-yellow color. This is due to the action of the acid in the apple with the air and moisture around. Bleaching. Bleaching is a great experiment choice to show that chemical changes can ...
These chemical change labs explore five types of evidence: bubbles, color, heat, odor, and light. First, kids experiment with physical change. Then they launch into reactions that create new substances.
In the simplest sense, a physical change is a change in the form of the original substance. A chemical change is a change in the composition of the original substance. A chemical change is also called a chemical reaction. Chemists have developed a list of common signs that may indicate the occurrence of a chemical change. These include: 1.
Aug 8, 2017 · Experiment 8 - Chemical Changes When a chemical change occurs, the chemicals that you start with are changed into different chemicals. We know when this happens because the new chemicals have different properties from the old ones. Thus, if bubbles appear in a liquid (and the liquid