

Easy Working Indoor Water Cycle Science Experiment for Kids
Categories Science , STEM
Can you make a working indoor water cycle experiment? Yes, and all you need are a few simple supplies. Kids will have a great time learning about earth science with this easy Water Cycle Science Experiment for Kids .
Along with the Snowstorm in a Jar experiment and the Rain in a Jar Experiment , this is a fun way to teach your class a little bit about water conservation or even just the weather in general. You can also grab a free printable water cycle diagram to use with your class.

Disclosure: Adult supervision is required for all activities at all times. Some of the links provided in this blog are affiliate links. I will be paid a small commission if you use this link to make a purchase.
Table of Contents
- What you’ll need
- Watch the video
Instructions
- Free printable water cycle diagrams
- What you’re learning
Materials Needed
- Salt (optional)
- Plastic Wrap
- Sticky tape
Watch the Water Cycle Video

Water Cycle Science Experiment for Kids – Instructions
1. add 2 tsp of salt into the large bowl.

This step is completely optional, and does not impact how the experiment works. I like to add salt to the water because it represents sea water. As the water goes through the water cycle process, it will turn into freshwater.
This means that your kids can actually taste how the water changes before and after going through the whole cycle.
2. Pour boiling water into the large bowl and mix until all of the salt has dissolved.

Boil the kettle and add a cup of water into the large bowl. Some people choose to also add blue food coloring into the water. Since food coloring does not usually evaporate with water, this is another great way to show how the water changed states of matter.
Different parts of this experiment emulate a different part of the water cycle. The warm water mimics the sun, only you’re using a kettle to heat the water instead of mother nature. This demonstrates evaporation.
3. Place the small bowl in the center of the large bowl.

Make sure that this small bowl is empty, as it will need to catch all of your water droplets. So it needs to be higher than the water level in the large bowl, but shorter than the edges of the large bowl itself.
4. Cover the large bowl with cling wrap.
Use cling wrap to cover the large bowl. You can use sticky tape or a rubber band to hold the cling wrap in place.
5. Place a handful of ice cubes in the center of the cling wrap.

Placing an ice cube in the center of the cling film has two purposes.
- It cools the water vapour, helping it to condense and cling to the film.
- It weighs down the center of the film, so that when the droplets of water are large enough, they will roll to the center of the film and drop into the small bowl.
The cling film and ice cubes mimic condensation. Although condensation usually results in some form of clouds, in this water cycle project you’ll see the water vapor turning into droplets.
6. Wait and watch

Watch as tiny drops of water evaporate and condensate on the inside of the large bowl, eventually filling the empty bowl with (now fresh) water. Representing the stage of precipitation.

But be prepared, only a limited amount of water will actually go inside the small bowl. So don’t be disappointed that you can’t ask your whole class to taste the small glass of water.
Like many science experiments, this one can take a long time to work. You can either keep placing more hot water in the large bowl, or put the entire setup by a sunny window on a hot day, and let the sun do it for you.
Free Water Cycle Diagrams

To grab your copy of the free printable water cycle drawing just click the large blue button below. Inside you’ll get:
- Full color water cycle diagram (labeled)
- Black and white water cycle diagram (labeled)
- Black and white water cycle diagram (unlabeled)
You can choose which diagram suits your science lesson and the capabilities of your students. Younger kids will most likely enjoy just coloring in the black and white version. While older children can label the parts and the water cycle themselves in the third version.
What You’re Learning
What is the water cycle – kid definition.
The water cycle (also known as the hydrologic cycle) is the continuous movement of water between the surface of the earth (like ocean water) and the atmosphere and land. When explaining the water cycle to kids, explore the main parts of evaporation, condensation, precipitation and collection.
How does the water cycle work? Step by step for kids
Earth’s water is always going through the different stages of the water cycle. When creating lesson plans to teach kids about the parts of the water cycle, it’s easier to break it down into the individual steps, instead of explaining the entire water cycle as a whole. As well as how the water keeps going through these same steps over and over again.
Try and use language suitable for the age of the students you are teaching. Young children, like preschoolers, will find it easier to understand “rain” rather than “precipitation”.
Evaporation and transpiration
Evaporation occurs when the sun’s heat warms up bodies of water, such as the surface of the ocean, enough to turn liquid water into water vapor. (Preschoolers may find this easier to understand if you explain water vapor as steam, as they most likely already have experience with steam from a kettle)
Transpiration is the water molecules that are lost to the atmosphere through the leaves of plants. This water also becomes part of the water cycle.
Condensation
As the water vapor reaches higher levels of the atmosphere it gets colder. These cold temperatures eventually turn the water vapor back into a liquid form. We can see this liquid water as the different cloud types in the sky.
Precipitation
As the water droplets in the clouds get larger and heavier, the water comes down in a form of precipitation, like rain water, hail or snow.
As it rains the water gets collected through rivers and streams. This water is used for plants or the water moves downhill until it reaches the ocean, and the whole process starts from the beginning again.
Are you going to try this Water Cycle Science Experiment for Kids? Don’t forget to pin the idea for later.


Water Cycle Science Activity for Kids

Show kids how the water cycle works with this simple science activity. Not only will they see the different stages that the water goes through, but they'll be able to taste the difference between the starting saltwater, and the resulting freshwater.
- Boiling Water
- Add 2 tsp of salt into the large glass bowl.
- Pour boiling water into the glass bowl and mix until all of the salt has dissolved.
- Place the small bowl in the center of the large bowl. If the small bowl floods with water, then you’ve added to much water into your large glass bowl. The small bowl needs to stay empty so that it can catch the freshwater.
- Cover the large bowl with cling wrap.
- Place a handful of ice cubes in the center of the cling wrap.
- Watch and wait as the boiling water evaporates and condenses onto the cling wrap. The condensation will slowly run and drip into the small bowl in the centre.
You will only get a small amount of freshwater in this experiment. So if you want the kids to taste the difference be prepared that not all of the kids in your class will be able to try some.
More Play Based Learning for Kids

Weather Activities for Kids

STEM Activities for Kids
Share this:
- Click to share on Facebook (Opens in new window)
- Click to share on Pinterest (Opens in new window)
- Click to share on Twitter (Opens in new window)
- Skip to primary navigation
- Skip to main content
- Skip to primary sidebar

- FREE Experiments
- Kitchen Science
- Climate Change
- Egg Experiments
- Fairy Tale Science
- Edible Science
- Human Health
- Inspirational Women
- Forces and Motion
- Science Fair Projects
- STEM Challenges
- Science Sparks Books
- Contact Science Sparks
- Science Resources for Home and School
Make a Mini Water Cycle Model
July 30, 2012 By Emma Vanstone 17 Comments
The water cycle is an amazing process that we started to talk about when discussing evaporation a couple of weeks ago.
Today we will have a go at creating our own mini water cycle model .
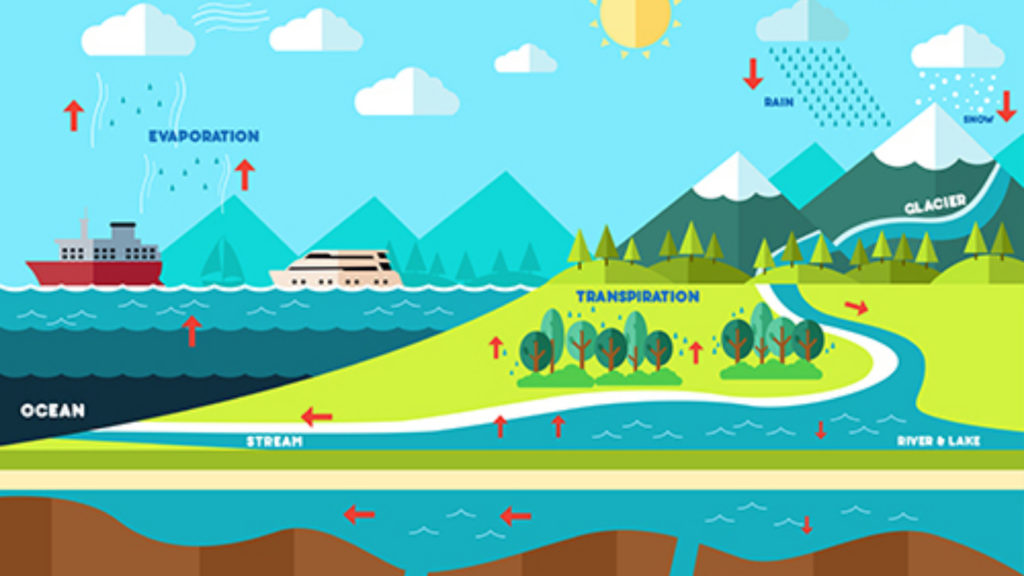
What is the water cycle?
Water on Earth is recycled over and over again; it’s always moving. It is this recycling process that we call the water cycle .
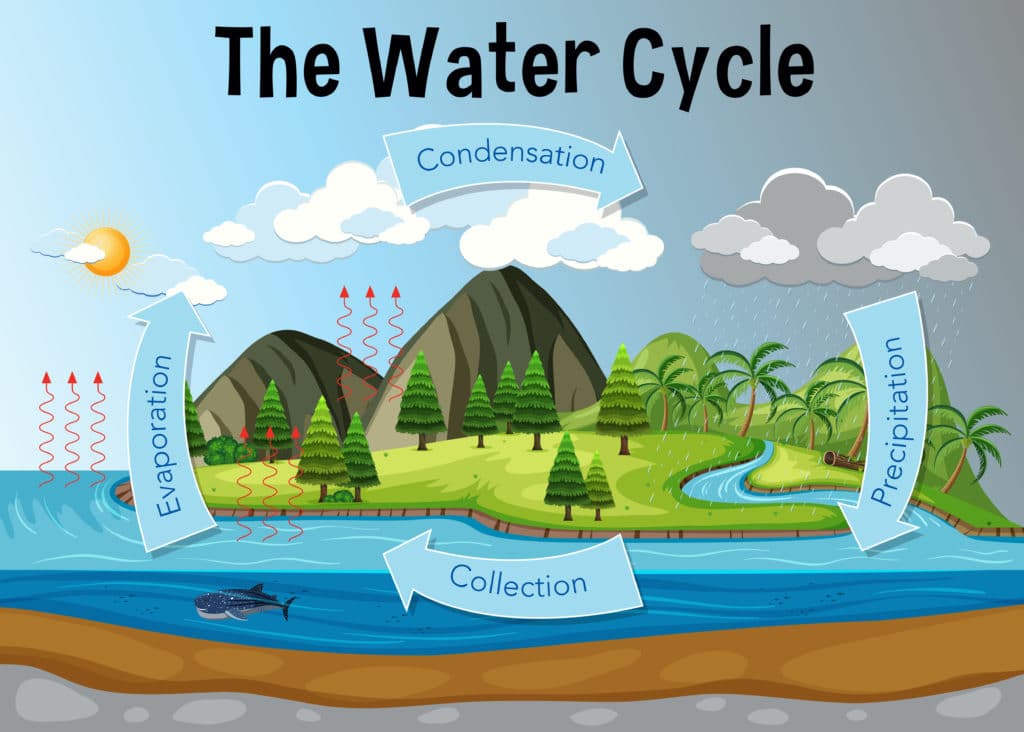
1. Evaporation – water evaporates into the air
The sun heats water on land, rivers, lakes and seas and turns it into water vapour.
The water vapour rises into the air.
2. Condensation – water vapour condenses into clouds
As water vapour in the air cools down, it turns back into tiny drops of water. These tiny drops of water form clouds.
3. Precipitation – water falls as rain
As the amount of water vapour in the clouds increases, the clouds get heavier and heavier. Water falls back to the ground as rain, sleet, or snow if it’s cold enough.
4. Water returns to the sea
As rainwater runs over the land back to rivers and the sea, some is taken up by and used by plants, and some returns to the air through transpiration. Most rainwater collects in lakes or rivers and flows back to the sea for the water cycle to start again.
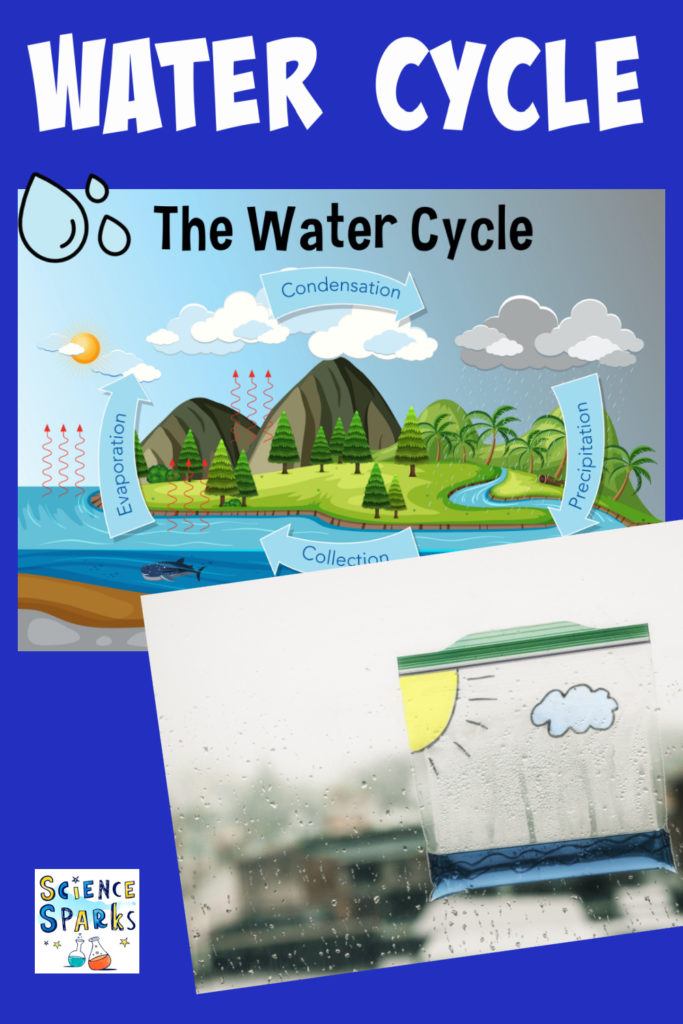
The arrow from the sea to the sun – evaporation
The arrow from the sun to the clouds – condensation
The arrow from the Clouds to the mountains – precipitation
Make a water cycle model
You’ll need.
A plastic bowl (mixing bowl size)

How to make a water cycle model
It is best to do this outside in a sunny place.
1. Place the mug in the bottom of the bowl
2. Add water around the mug so that it comes up to ⅔rd of the mug – if you can draw on the bowl, mark where the water level is.
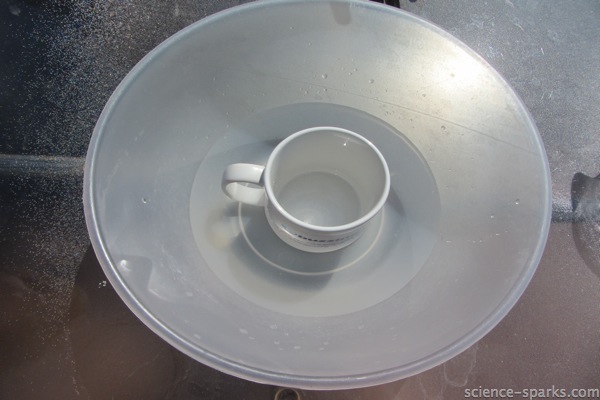
3. Cover the bowl tightly in clingfilm and fasten it in place with the string.

4. Watch what happens!
How does the water cycle model work?
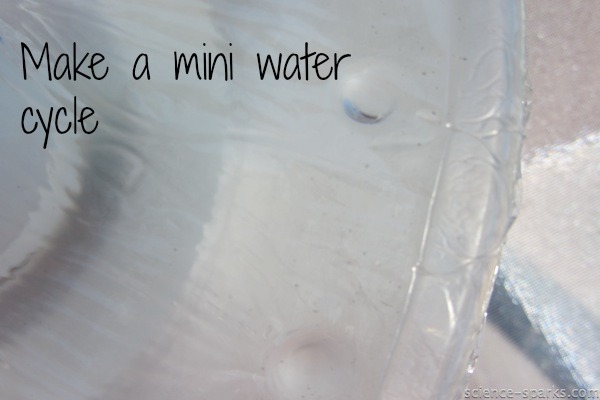
You should find that you can see condensation drops of water on the top of the cling film and that the water level has lowered, proving that evaporation has taken place. The condensation droplets are the clouds. They will be dripping back into the bowl, but you should find some water in the cup (your mountains), demonstrating precipitation!
More Water Cycle Activities
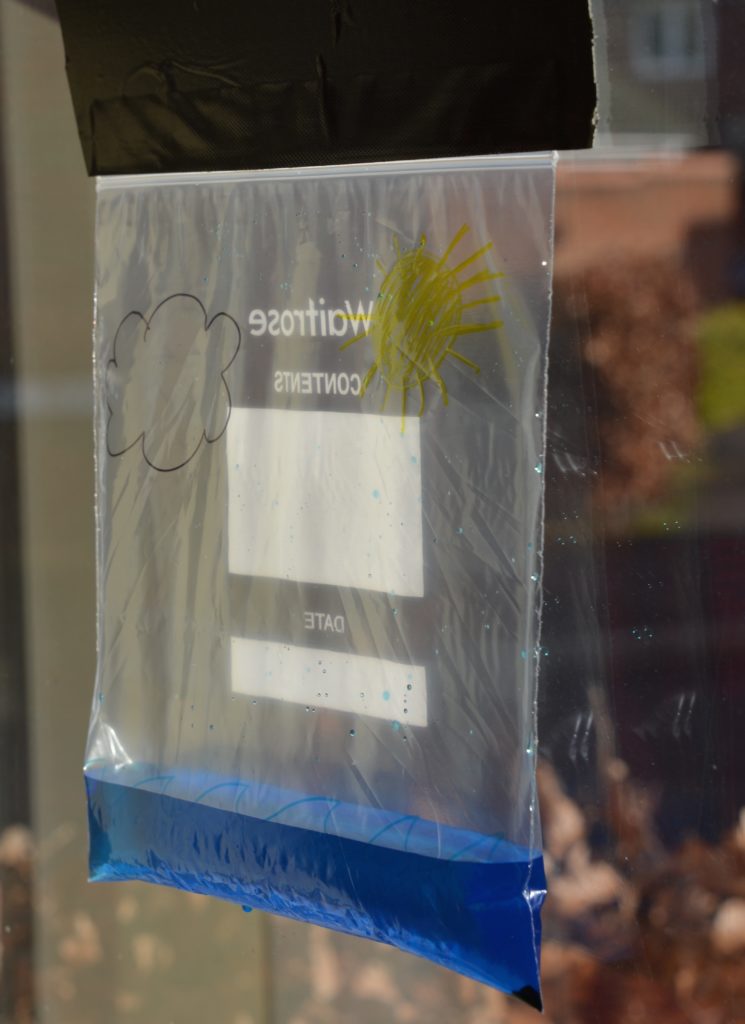
Can you make a water cycle in a bag? Draw the sun and a cloud on a bag. Add some water and stick it to the inside of a sunny window. Watch as the water evaporates and condenses inside the bag!
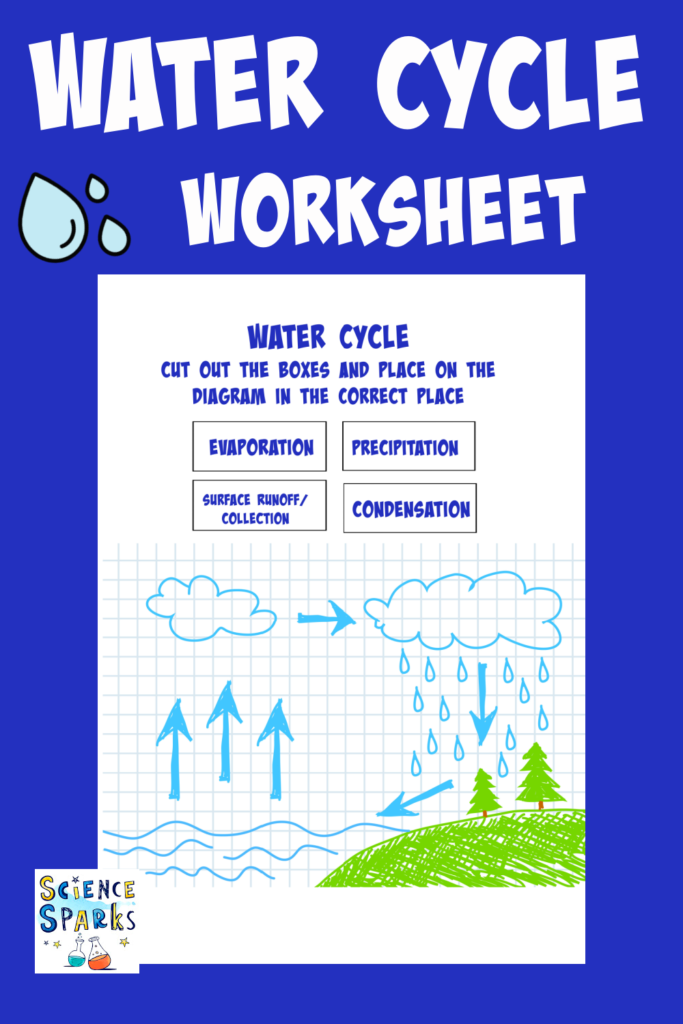
Water Cycle Worksheet
Print the water cycle diagram below, cut out the squares and stick them in the correct place!
We love this LEGO water cycle model from EDventures, and this raining sponge from The Pinterested Parent is cool too.
Did you know you can measure rainfall with a simple rain gauge ?
Don’t forget to try my other weather science experiments too!
Last Updated on January 26, 2023 by Emma Vanstone
Safety Notice
Science Sparks ( Wild Sparks Enterprises Ltd ) are not liable for the actions of activity of any person who uses the information in this resource or in any of the suggested further resources. Science Sparks assume no liability with regard to injuries or damage to property that may occur as a result of using the information and carrying out the practical activities contained in this resource or in any of the suggested further resources.
These activities are designed to be carried out by children working with a parent, guardian or other appropriate adult. The adult involved is fully responsible for ensuring that the activities are carried out safely.
Reader Interactions
August 01, 2012 at 8:40 am
What a great activity! Love your diagram, too.
Thanks for sharing with Learning Laboratory at Mama Smiles =)
August 09, 2012 at 11:29 am
Thank you. xx
August 02, 2012 at 12:06 am
Such a great way to introduce education into play. All my kids love science experiments.
Its lovely to see them enjoy science isn’t it?
August 02, 2012 at 5:21 pm
Ooh fabulous project – as always!
Thank you for sharing on Kids Get Crafty!
Thanks Maggy 🙂
August 06, 2012 at 11:56 am
LOVE Science experiments to get kids interested in Science! We have this on our list to try too. Thanks for sharing it at TGIF! Have a great week Beth =-)
August 09, 2012 at 11:30 am
So glad you liked it Beth!
August 10, 2012 at 3:05 am
What a great activity!! We will have to give this one a try. Thank you for sharing at Sharing Saturday!!
August 11, 2012 at 5:27 am
I’m pinning this to do with my boys in the near future, and I’m featuring on The Sunday Showcase tomorrow. Thank you for sharing!
August 11, 2012 at 12:51 pm
Great idea! I’ll have to try it with my girls!
February 27, 2013 at 5:50 pm
i loved it❤❤❤❤❤❤❤
March 18, 2015 at 5:54 pm
This was So cool!!!!!!!!!!! I love science!
March 18, 2017 at 8:42 pm
this is an excellent hands on activity to explain the process of the water cycle. students get to see each process and lean from observations. It is very engaging.
June 17, 2017 at 1:07 am
How long should the bowl be left outside before students check it?
February 28, 2018 at 6:01 pm
This is awful so awful lets go science yay yippie kai yaaa
PS your unloved
May 15, 2018 at 5:51 am
Such a scenic view ,looks great. Lovely.
Leave a Reply Cancel reply
Your email address will not be published. Required fields are marked *
